

If you want to become a first-class Bitcoin citizen, you should set up a full node. This is the only way to verify your own transactions and use Bitcoin in a truly trustless way. This is how it works.
Why to run a Full Node
A Bitcoin Full Node is a complete copy of the Bitcoin transaction history starting from the Genesis block. Once the node is synchronized, i.e. the transcript of the blockchain is created, the node checks Bitcoin transactions for validity. If, for example, a double-spend transaction reaches the node, it is rejected.
The higher the number of nodes, the more secure the network. So if you want to live the Bitcoin ethos of decentralized consensus building and support the network, you need to set up a Full Node. After all, it’s not for nothing that Bitcoiner:in circles say, “Don’t trust; verify.” A Node thus also protects one’s own investment, because the value of Bitcoin increases with the degree of decentralization.
In addition to these more altruistic goals, there are a number of tangible reasons to become a “First Class Bitcoin Citizen.” For example, anonymous use of the Bitcoin network is only possible with the help of one’s own node. Even those who have their coins on a hardware wallet entrust valuable data to the wallet manufacturer.
After all, the wallet is connected to the manufacturer’s node (Ledger, Trezor and others). The companies are therefore able to access a large amount of sensitive data, which can compromise the privacy of the user. For Bitcoiners, operating their own full node is therefore mandatory. And this is how it works.
Shopping list – what you need for the Full Node
- Raspberry Pi 4
- 1 TB SSD hard disk
- Cover for the SSD hard disk
- 16 GB Micro SD
- Power supply for Raspberry Pi (important: make sure to buy the original power supply)
- Ethernet cable
- SD Card Reader
- Optional: Case for Raspberry Pi 4
Software
- Umbrel OS (you can find it at: getumbrel.com)
- Balena Etcher
Here’s how:
Step 1
Download the Umbrel operating system at getumbrel.com.
Umbrel has written an implementation of the Bitcoin Core source code and offers the program for free download.
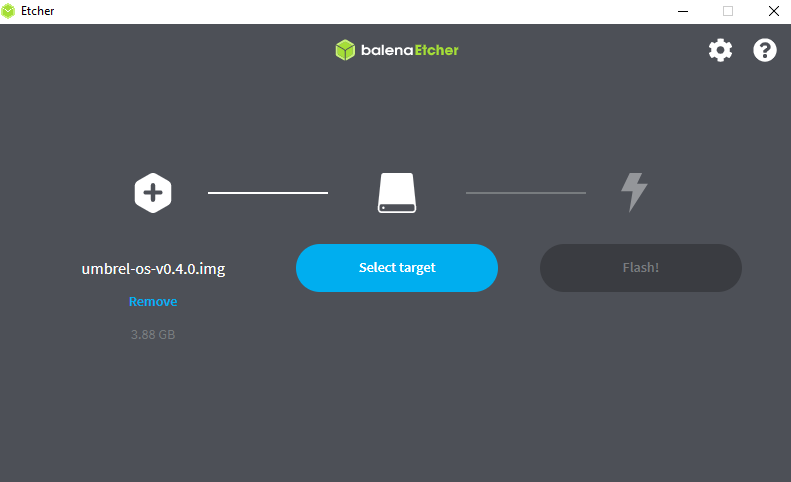
The next step is to write the Umbrel OS to the SD card so that the Raspberry Pi knows what to do. For overwriting the software to the SD card, also called flashing, you need a special software. We recommend Balena Etcher for this. You can find the software at balena.io/etcher/.
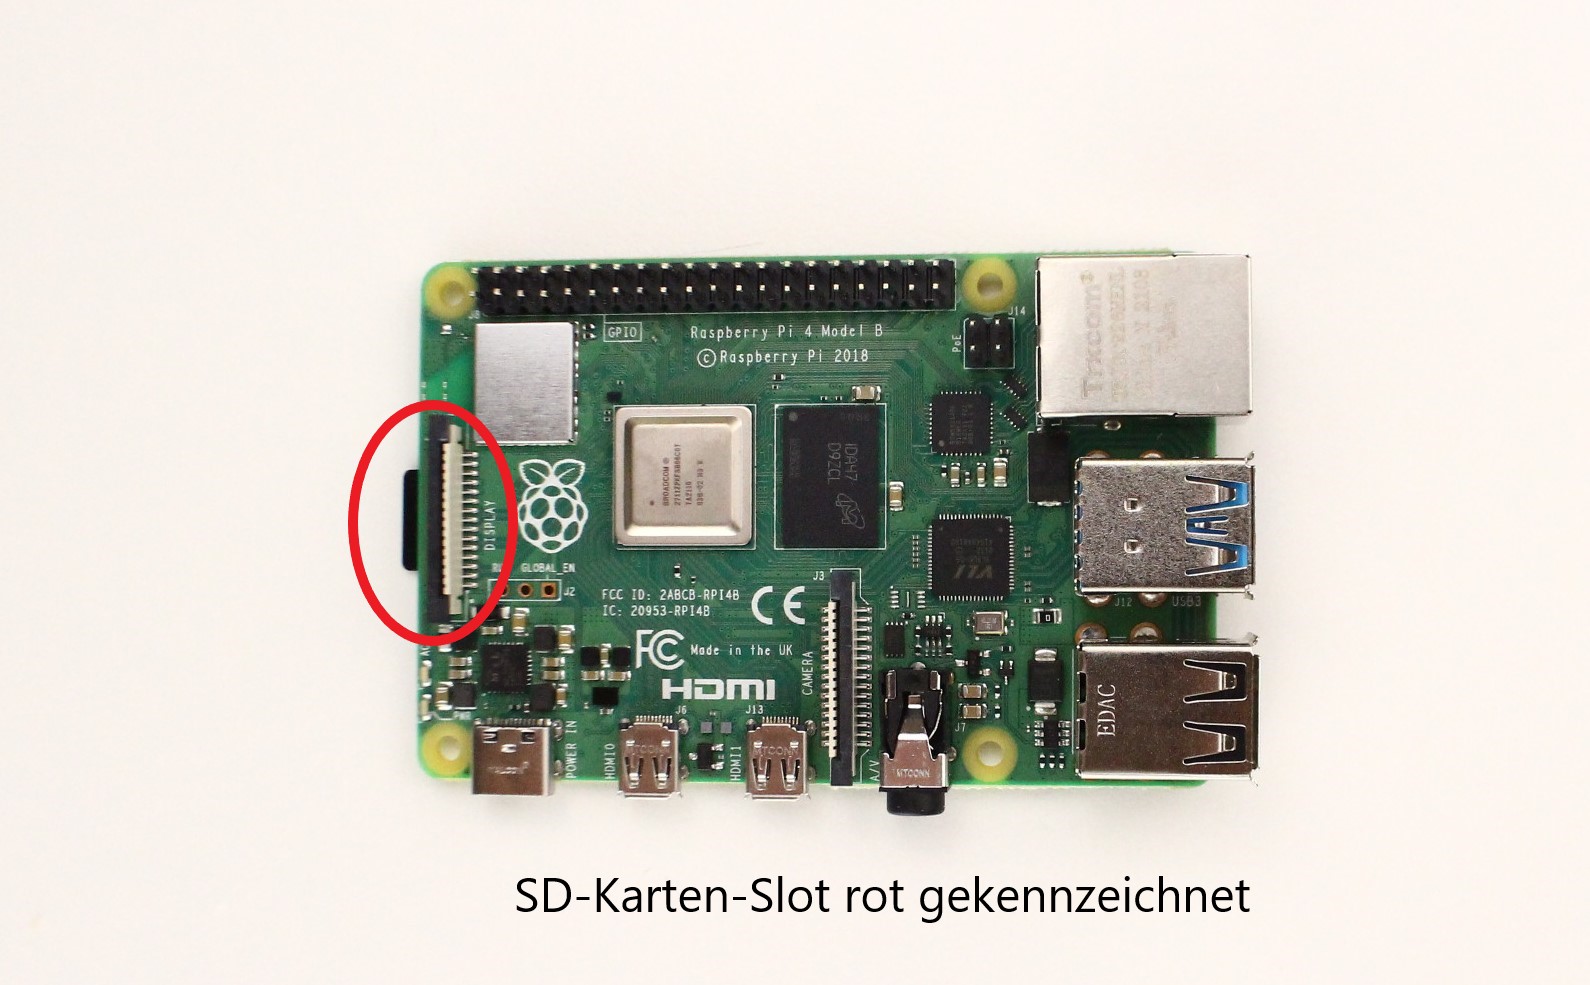
Connect the SD card to your computer. If your computer does not have a SD slot, you need a SD card reader.
This is how you write the Umbrel software to your SD card:
Step 2
Step 3
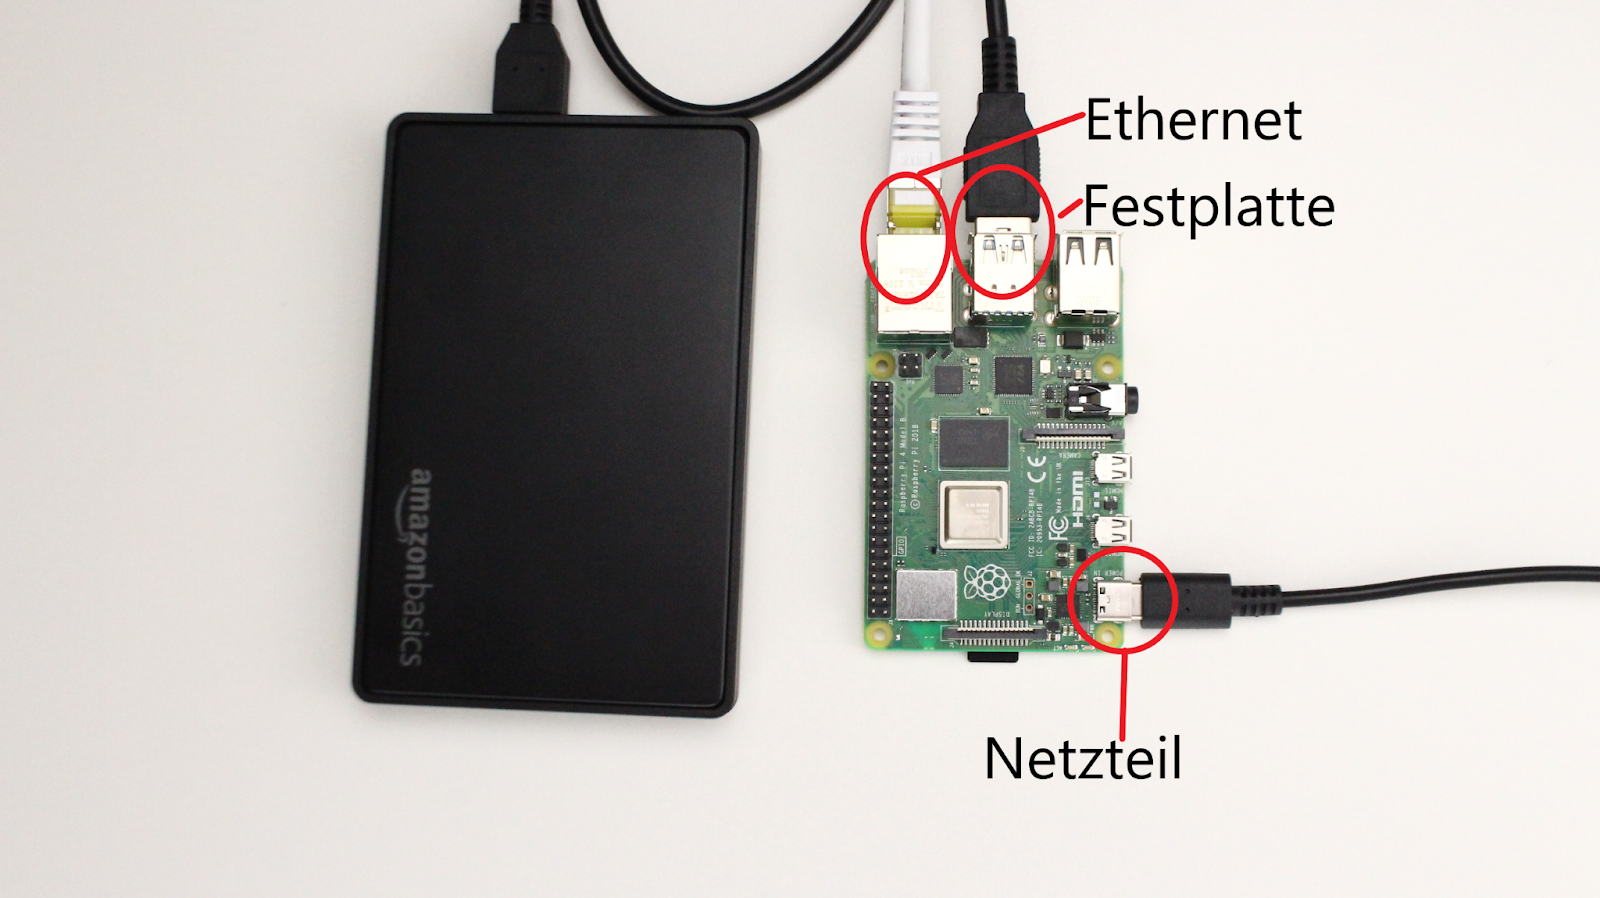
Connect the SSD hard drive to a USB port on the Raspberry Pi.
Step 4
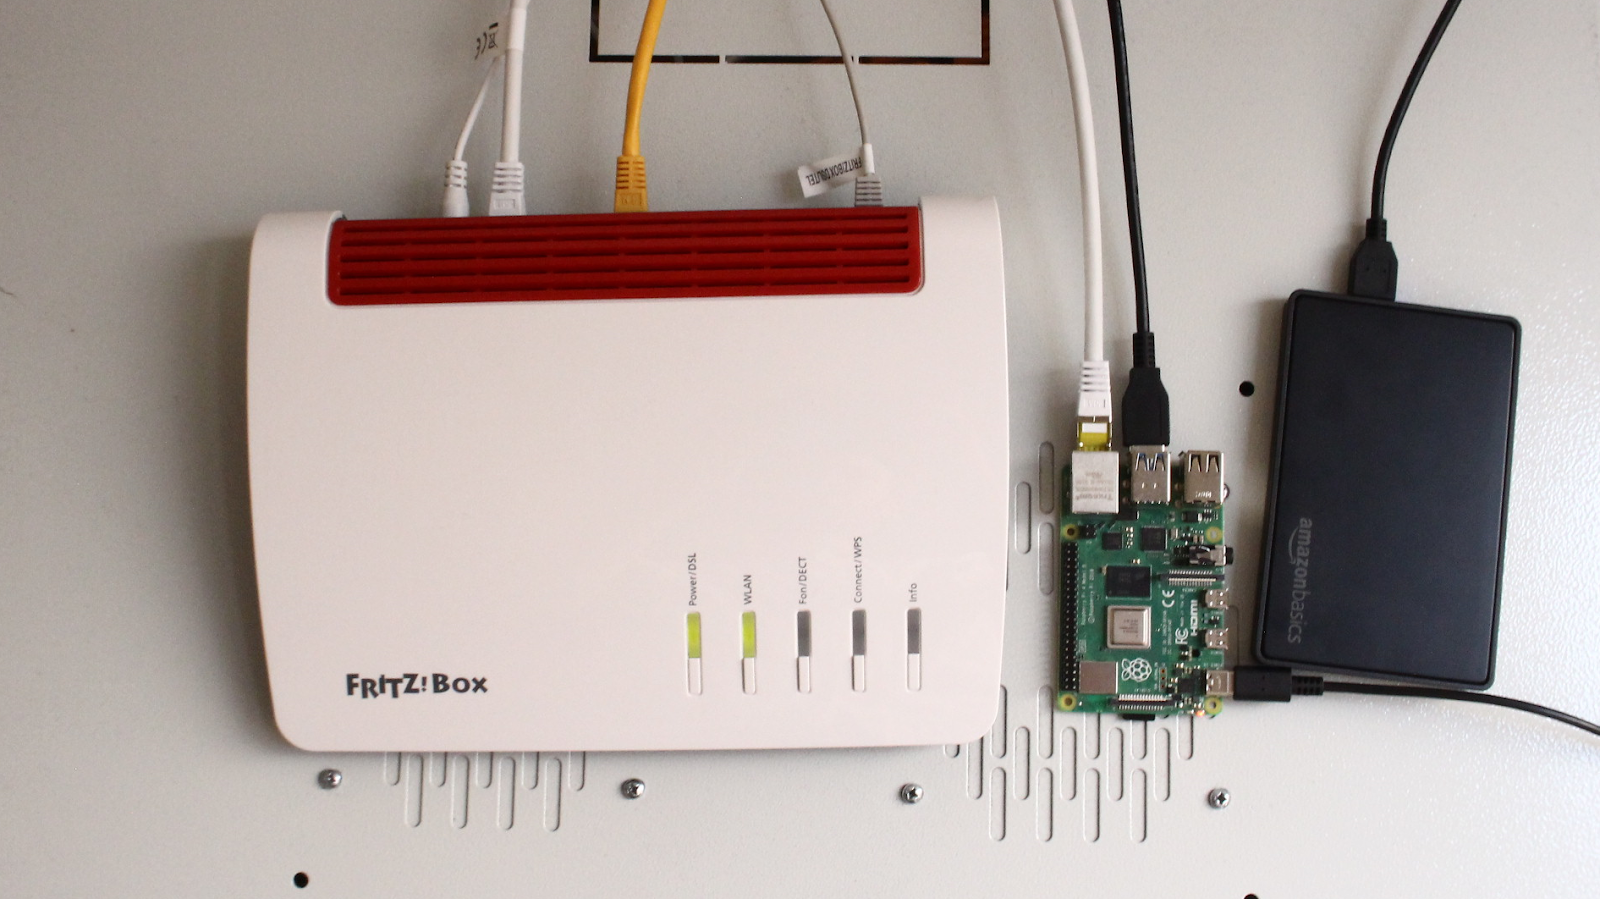
Connect the Ethernet cable to your home wifi router.
Tip: The easiest way to access Umbrel is to use a computer that is connected to the same Wi-Fi network as the Node. When you are on the road, you can access your node using the TOR browser.
Step 5
Connect the power adapter to the device and plug it into the power supply.
Step 6
Connect the Ethernet cable to your wireless router.
Step 7
Watch your node synchronize. Under umbrel.local you can access the graphical user interface of your node. With a fast internet connection, the blockchain should be synchronized in a few days.
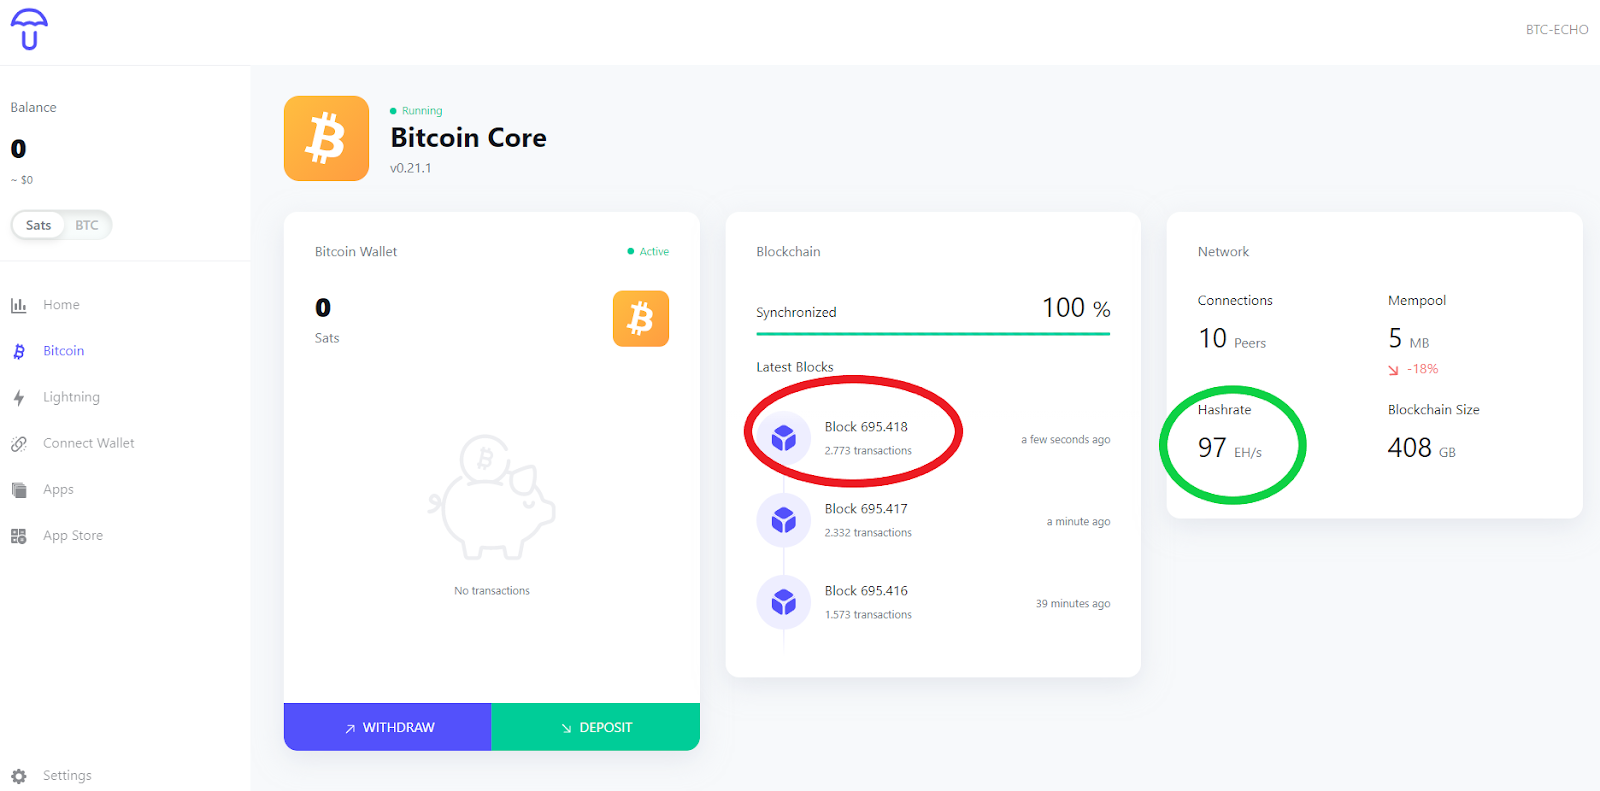
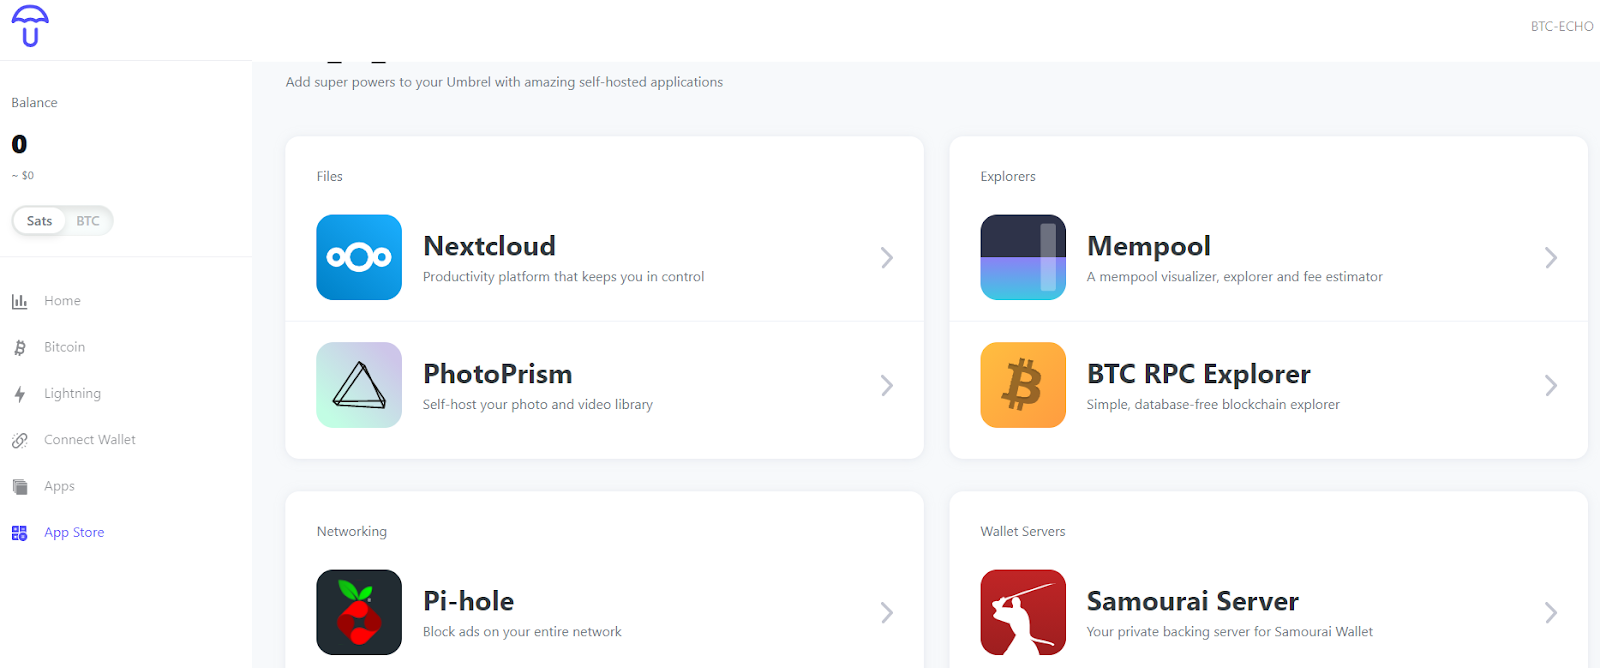
You can install various apps from the App Store, such as Block Explorer. This allows you to search the blockchain for specific blocks or transactions, for example, and verify them independently without having to trust third parties.
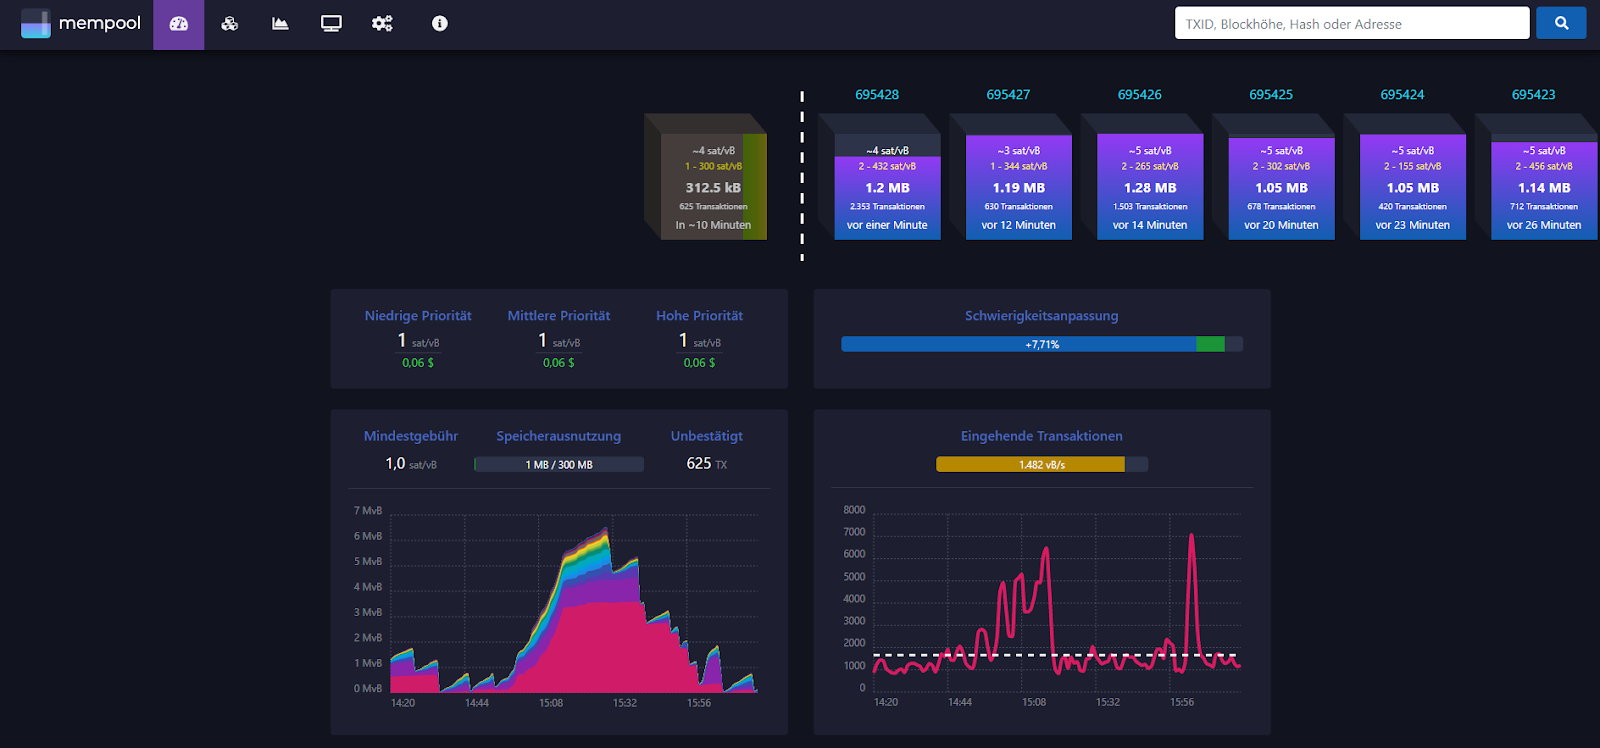
The Mempool Explorer is a graphical representation of the current events on the blockchain. There, the utilization of the mempool can be read out and, for example, how high the current transaction fees are.
Disclaimer
This article was previously published in December 2021. It has been reviewed and adjusted accordingly for republication.
Picture by Pexels